A lot of our users love to use Wufoo for [lead generation](http://www.wufoo.com/gallery/templates/lead-generation/) purposes to help jump start their [mailing lists](http://www.wufoo.com/gallery/templates/forms/mailing-list/) and email campaigns. With each new email address and lead you collect, it’s important communicate periodically to maintain and cultivate a good relationship with your users. While Wufoo has the ability make a great first impression with our built in custom confirmation emails, which are sent on submission to Wufoo, you can take things a bit further by setting up special emails to be sent to your new subscriber after a certain amount of time has passed using our [MailChimp form integration](http://www.wufoo.com/partners/mailchimp/).
In this tutorial, we’ll create a Chemiztry Club form that will ask people to sign up for a newsletter after purchasing a chemistry kit. In addition to the newsletter, we’ll send all new subscribers a series of three time-delayed emails. One right away for things they need to know as new owners of a chemistry kit, and two others with increasingly advanced tips on using it.
### Step 1: Set up form
The first step is to build the form to look how you want and gather the information you need. Since one of the purposes of this form is the email followup, we’ll need to ask for an email address. We’ll make this newsletter an opt-in by having a checkbox choice, with it defaulting to checked.
### Step 2: Set up regular MailChimp integration
We’ll be adding these new signups directly to a MailChimp list. So if you don’t already have an existing list for this in your MailChimp account, create one.
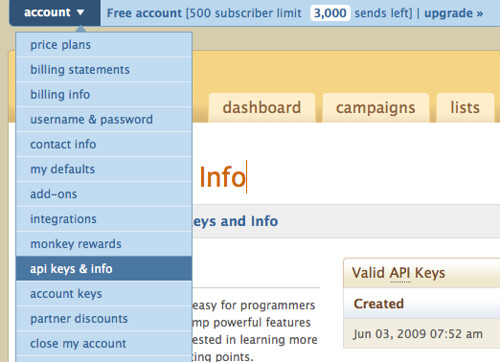
To set up the Wufoo/MailChimp integration, you need your MailChimp API key. Use the Account menu dropdown to get to that page.
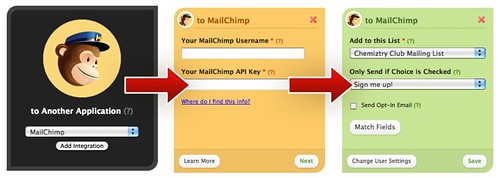
In the Notifications area for this form, choose the MailChimp integration and go through the process.
### Step 3: Test out the basic integration
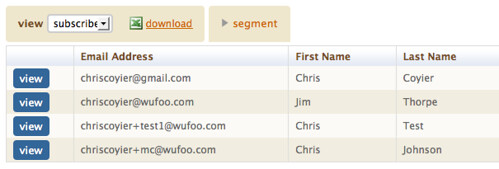
With this integration set up, you should be able to test it out by filling out your Wufoo form and seeing the email address get added to the MailChimp list.
### Step 4: Passing today’s date
Newly added members to the MailChimp list will have a `date added` field, but unfortunately this won’t trigger the Autoresponder for us when they are added through the integration in this manner. To force it to work, we need to give it our own date to base the Autoresponder timing off of. So we’ll create a Date field on our form, using the keyword “today” to autofill it and CSS keyword “hide” so it doesn’t actually show (but will still submit data).
### Step 5: Adding date to List data
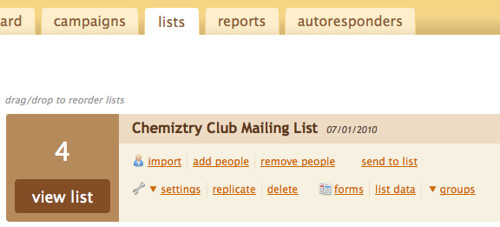
To capture this data on the MailChimp side, we need to add a new field to the list data. Click the list data button when viewing all lists.
Add a new field.
Choose the **date** type and call it “Wufoo Add Date”.
### Step 6: Match fields in Wufoo integration
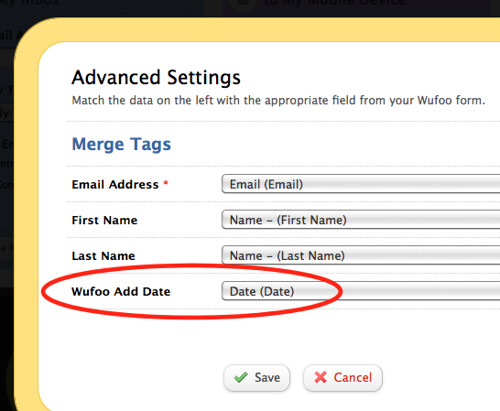
We’ve already matched fields when we first step up the integration. Let’s go back into Notifications and change the settings of the MailChimp integration and go back into that Match Fields area. Now we can match up the Wufoo Add Date and the Date field on our form.
### Step 7: Create a MailChimp Autoresponder
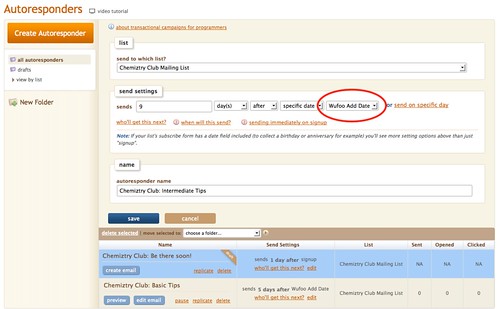
The time delayed email action is handled by a feature in MailChimp called autoresponders. We’ll be setting things up so MailChimp sends one right away and two others down the road with our advanced tips. We’ll create those as new Autoresponders and base their send date off the Wufoo Add Date field.
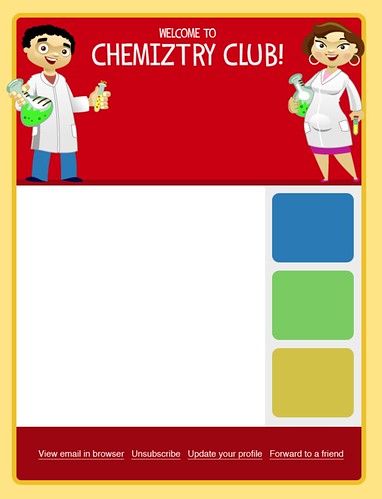
After the settings are chosen for the Autoresponder, you can create the actual emails. Since our plan was to send multiple time-delayed emails, it is probably smart to use MailChimp templating and create a template that will work for all of them and keep your branding nice and consistent.
### Step 8: Test the Autoresponder
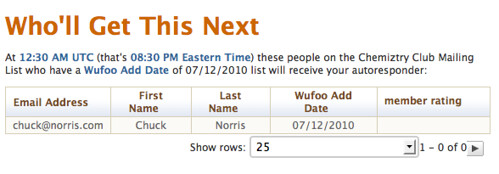
Just like in Step 3, we should test things out by submitting our Wufoo form and checking that all the data has made it over okay. After a new submission, you should be able to click the **Who’ll get this next** button when viewing your MailChimp Autoresponders and get a popup window that will will show all new subscribers who will be getting the time delayed email.
Of course, proof is in the pudding, so you should probably set up a one-day autoresponder as a test and add yourself and verify that it actually comes. Once you’re sure everything is running smoothly, you can remove that down the road.
### Wrap up
Now you know how to use Wufoo to send emails to people after a time delay using MailChimp’s autoresponder feature. Using MailChimp not only makes this feature possible, but comes with all the regular cool features of MailChimp like being able to track the sent/opened/clicked statistics of the email so you can gauge how it’s doing. Plus, MailChimp email delivery is remarkably reliable. Let us know if you have any questions!


