By Mike Wong
Ever find yourself in a situation where you’ve created a form and want the Notification emails to send to different people based on a particular field choice? Or wanting to send your respondents a custom email based on their submitted answers? In this round of Tips & Tricks we’ll go more in depth on how to achieve this and more with the Form Rules feature available to our paid plans!
Notification Emails
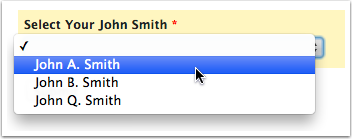
A common example of using the form rules to send notification emails is to direct the notifications to specific departments or supervisors within an organization. In our demo example, we’re going to provide our respondents the option of choosing to direct their entry to a specific team member at the booming startup, YourDomain.com.

The Rules
With the form built it’s time to head over to the Rule Builder. You can access the Rule Builder for each form in your account by clicking the Rules button of the form row from the main Form Manager view.

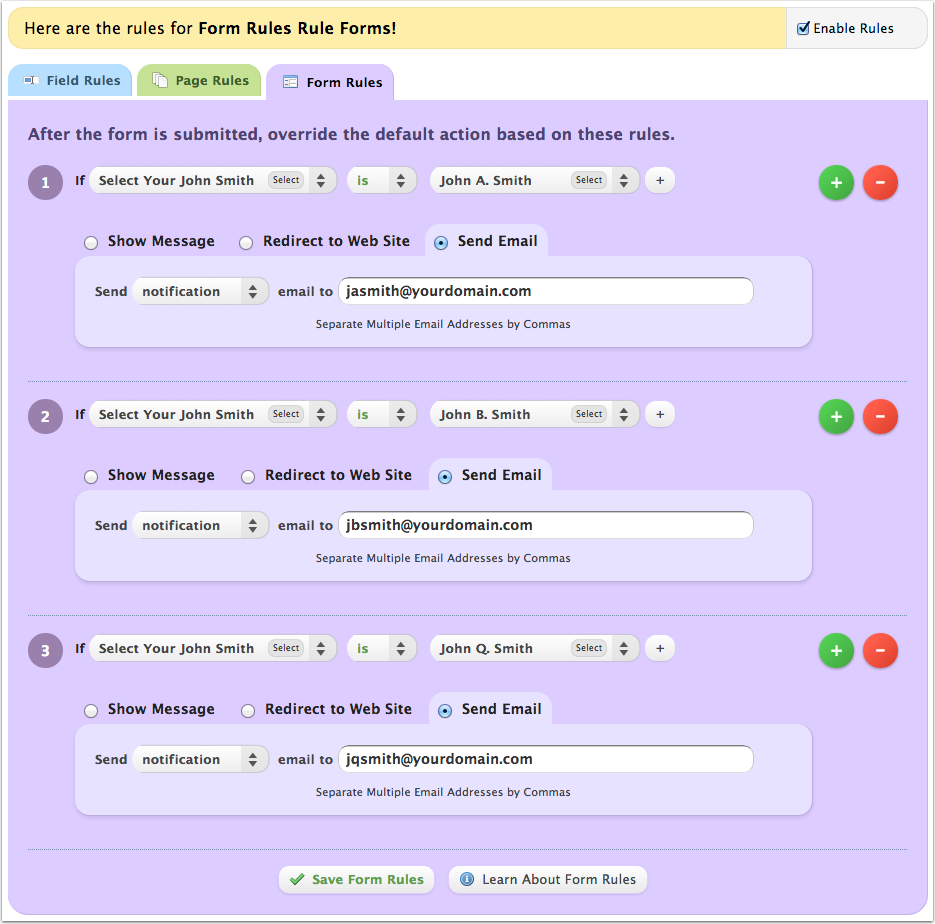
Once in the Rule Builder section, we’ll click on the Form Rules tab, and then get down to business. Here is where we’ll create a separate rule for each of the choices available within our drop down field. In each rule, we’ll also choose the option to Send Email, select our email type, as well as define the address to send the notification email too.


Confirmation Emails
Confirmation emails are the messages that are sent back to your respondents once they submit an entry to your form. To set these up, all that’s required is that your form have an email field (naturally!). Once that’s established, you’ll have the confirmation option available from the email type drop-down.
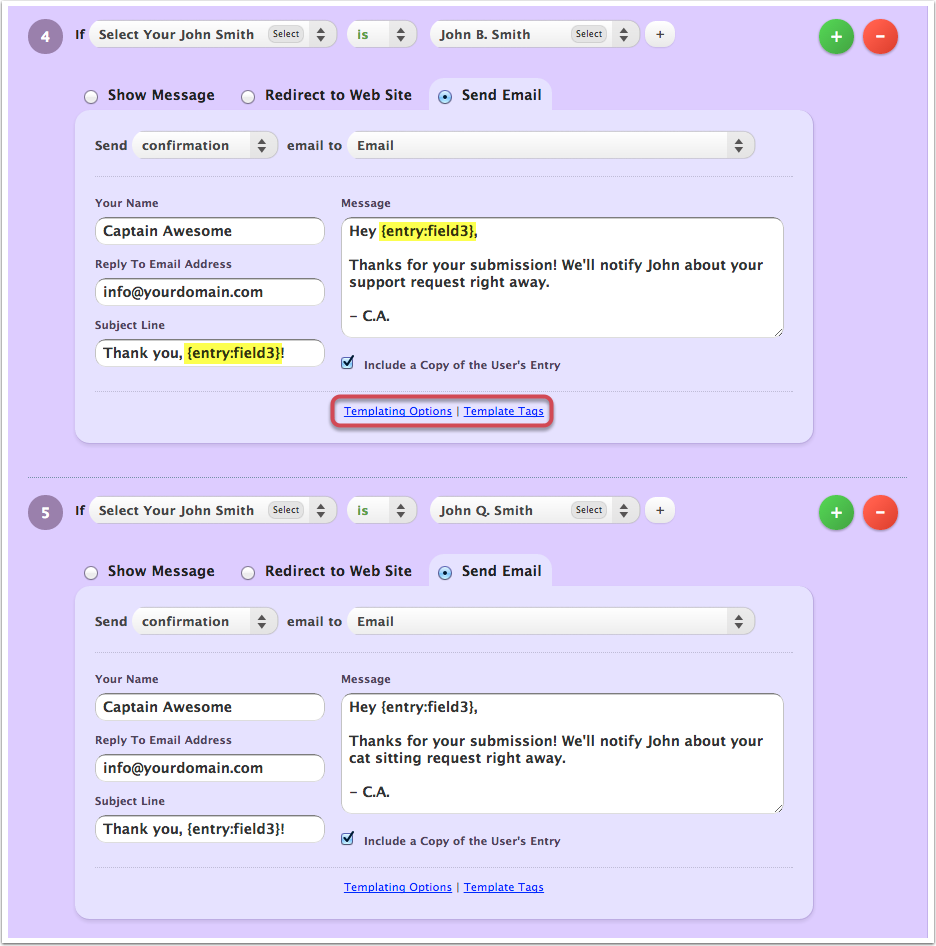
At the illustrious YourDomain.com, John B. Smith handles support requests while John Q. Smith is Lead Feline Supervisor. With respect to that, we’re going to configure custom confirmation emails based on our drop-down field and their roles.

Pro Tip!
You’ll notice that within the Confirmation Messages we used our Templating feature for added personalization.
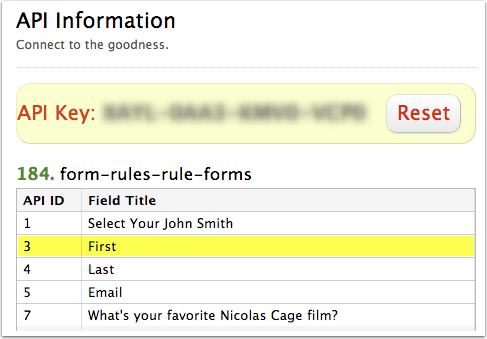
In every confirmation message setup box (as well as within the confirmation message features) you’ll find hyperlinks that lead directly to both the Templating Help Center page, as well as a link that goes directly to the API Information page for your form.
It’s in this second link where you’ll be able to find the field IDs for your form so you can call back the value entered by your respondents. In this case we’re calling out the First Name field in order to address our form users directly.
Super Special Notes
When a Form Rule is triggered to send a Notification and/or Confirmation email, they will overrule any settings within the Form Settings tab of the Builder, or the Notification Settings page respectively. Keeping this in mind, if you want all notification emails to go to a standard address as well as a variable address you’ll add it to the rule as shown above.
Also, with each submission only a single rule of each email type can be activated at a time. What does this mean exactly? If you have more than one form rule and an entry satisfies more than one of those rules, then Wufoo will send the Notification Email only to the very last Notification Email rule that meets the condition.
And there you have it!
I hope this cannon ball into the Form Rules feature serves you well, form friends. If you’ve any feedback, please feel free to leave a comment below. For any questions, be sure to reach out to us and say howdy!
Until next time…

